Figure -6 B₁ BB y (m) 6 4 2 -20 2 4 6 ·x (m) 2 of 2 Part C Now, combine the information given in the tactics box above to find the x and y components, B₂ and By, of vector B shown in the figure.(Figure Express your answers, separated by a comma, in meters to one significant figure. [Π| ΑΣΦ B₂, By= Submit Request Answer 4 → C ? m, m
Figure -6 B₁ BB y (m) 6 4 2 -20 2 4 6 ·x (m) 2 of 2 Part C Now, combine the information given in the tactics box above to find the x and y components, B₂ and By, of vector B shown in the figure.(Figure Express your answers, separated by a comma, in meters to one significant figure. [Π| ΑΣΦ B₂, By= Submit Request Answer 4 → C ? m, m

Related questions
Question

Transcribed Image Text:Figure
-6
B₁
BB₁
y (m)
4
2
-2 O
-2
TE
प
2
1
→ x (m)
2 of 2
Part C
Now, combine the information given in the tactics box above to find the x and y components, B and By, of vector B shown in the figure.(Figure 2)
Express your answers, separated by a comma, in meters to one significant figure.
ΓΙ ΑΣΦ
Bx, By =
Submit
Request Answer
?
m, m
Expert Solution
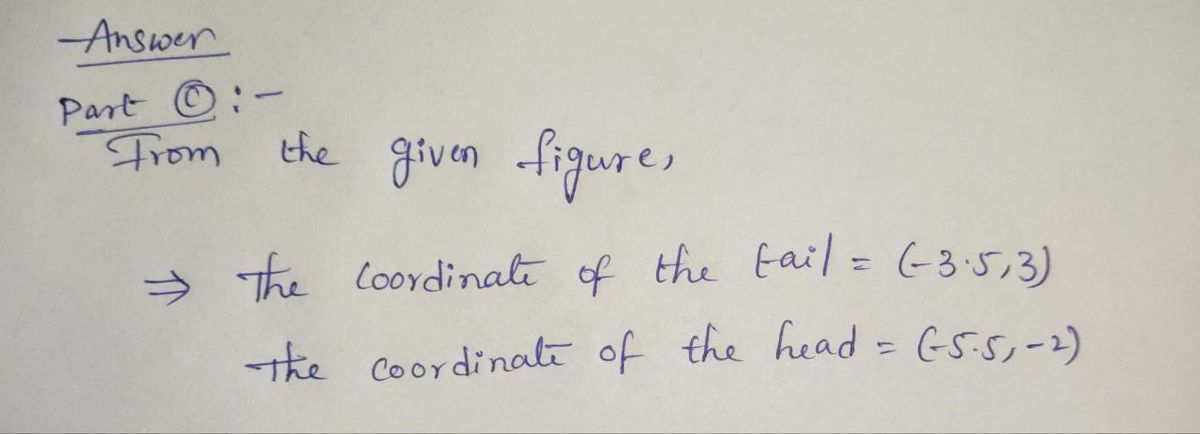
Step 1: part c from the given fig.

Step by step
Solved in 3 steps with 3 images
